Learn step-by-step how to fix a bent garage door and get it back to smooth operation quickly and efficiently.
Key takeaways:
- Inspect for bends, misalignments, and damage.
- Loosen hinges and bolts to relieve tension.
- Straighten tracks using pliers or a rubber mallet.
- Gently hammer dents, working from edges to center.
- Replace severely damaged panels with a new one.
* Identifying the Bent Section
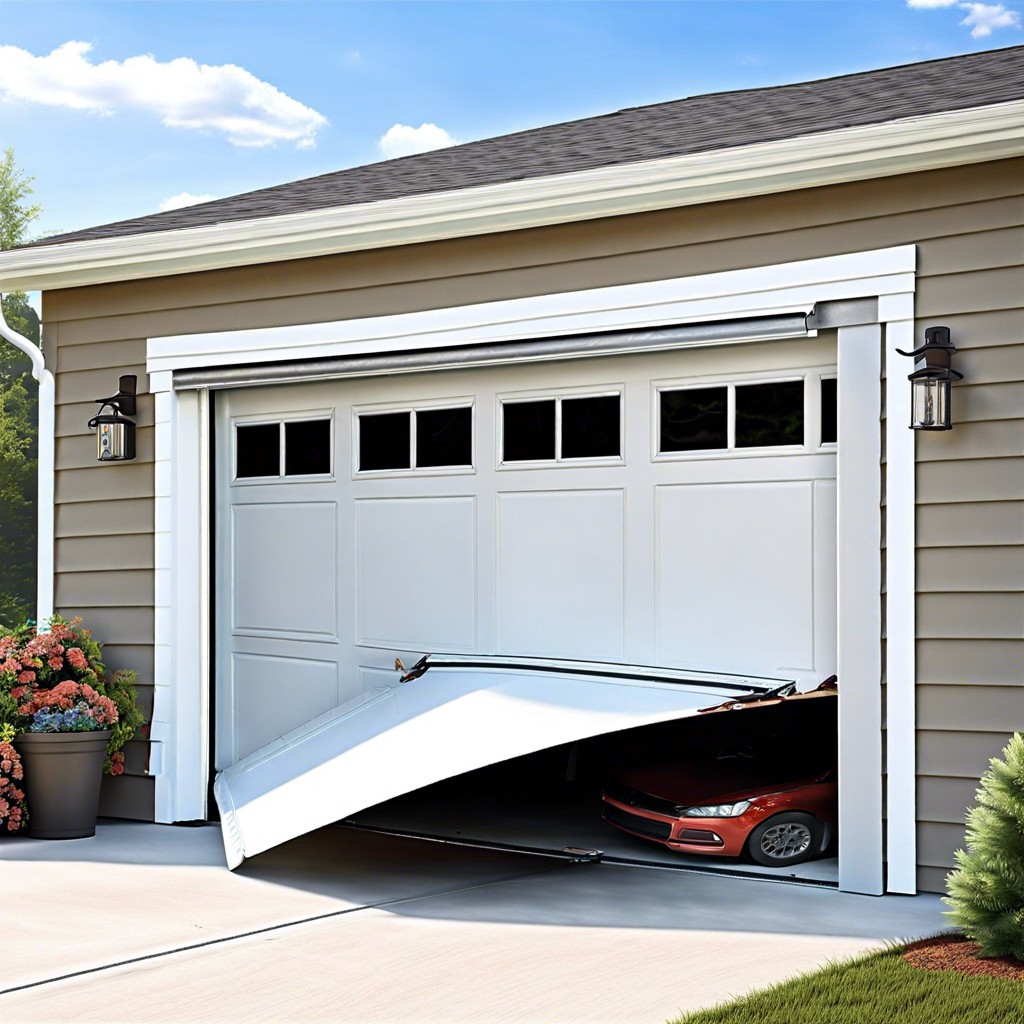
Bent garage doors can be tricky. Before you don your detective hat, take a moment to perform a visual inspection. Look for any obvious warps, dents, or misalignments.
- Start with the tracks. Check if they’re straight or if they appear to be bowing out like a gymnast trying a new move.
- Move to the hinges and rollers. See if any of them look like they’ve been through a mini wrestling match.
- Examine the panels. Sometimes, a single panel can be the culprit, masquerading as a bigger issue.
Don’t overlook the bottom part. Gravity is a tough opponent, often bending the lower sections more than the top.
Being thorough yet quick in your inspection will save you time and potentially an emergency visit from the repair guy.
* Loosening the Necessary Hardware
Start by gathering all the tools you’ll need. A basic set including a wrench, screwdriver, and pliers should do the trick. Prepare to get your hands dirty.
First, locate the relevant screws or bolts holding the bent section in place. These are generally found along the hinges and brackets. Loosen them slightly—just enough to relieve some stress from the bent area, but not so much that the door becomes unstable.
If you’re working on a manual garage door, make sure it’s propped open securely. For automatic doors, unplug the opener; safety first! Now, as you work on loosening the hardware, keep track of everything. Nothing like misplacing a bolt to turn a 10-minute fix into an afternoon scavenger hunt!
Once the screws or bolts are suitably loosened, you can move the bent section more freely. This will make the next steps a breeze—well, more like a refreshing gust of wind in your fix-it endeavor.
Enjoy this rare opportunity to bond with your garage door. “You bend, I mend!” could be your new motto!
* Straightening and Restoring the Track
Time to get that wobbly mess back on track, quite literally! Here’s what you’ll do next:
First, let’s carefully bend the track back to its original shape. Use a pair of pliers for smaller bends and call in a rubber mallet if things are more serious. Give it a few firm taps to persuade the track back into alignment.
Once contorted metal resembles a straight line again, re-secure any loose bolts with a wrench. Make sure the track is properly aligned, so it won’t give you headaches later.
Don’t forget to check for any debris or grime while you’re down there. A clean track is a happy track. A little lubricant goes a long way here, so don’t be stingy with that garage door grease. This helps things glide smoothly.
Now, manually test the door by moving it up and down. It should operate without hiccups or the sounds of a terrifying haunted house. If it’s still struggling, there might be another bend hiding somewhere, so keep your detective hat on.
* Hammering Out the Bend or Dent
Start by securing the garage door, ensuring it won’t move unexpectedly.
Grab a rubber mallet for this job; a regular hammer can cause more damage (and you definitely don’t need extra projects right now).
Gently tap the bent or dented area. Think of it as coaxing the metal back into shape rather than punishing it for misbehaving.
Work from the edges of the dent towards the center. This method makes the process smoother and helps avoid creating new dents or irregularities.
If the bend is particularly stubborn, a block of wood can provide extra leverage. Place it against the dent and tap the wood instead of directly hitting the metal. It spreads the force more evenly.
After straightening, check to ensure the door runs smoothly along its track like butter on a warm pancake.
* Replacing the Damaged Garage Door Panel
Got a door panel that looks like it lost a fight with a wrecking ball? Sometimes, straightening just won’t cut it. Here’s the lowdown on swapping out that damaged panel:
First, grab a buddy. Garage door panels are cumbersome and, let’s be honest, you’ve got better things to do than wrestling with one solo. Safety first, fun second.
- Disconnect and Power Down: Unplug that garage door opener. Avoid any surprises – the only thing that should go up and down in your garage right now is your enthusiasm.
- Remove the Damaged Panel: Unscrew the hinges and track rollers attached to the panel. Be systematic— you don’t want spare parts turning your garage into a hardware store.
- Position the New Panel: Slide the new panel into place just like sliding into a favorite old pair of jeans. Secure it with hinges and attach the track rollers. Sometimes, fitting things perfectly requires a bit of a wiggle – embrace it.
- Reconnect Everything: Bolt in the hinges and rollers securely. Double-check your work. Wobbly isn’t a good look for a garage door (or a table leg, or… anything, really).
- Test It Out: Plug the opener back in and test the door. Smooth like butter? Awesome. No? Check for any misplaced or loose components.
Save that old door panel for a fun DIY project or drop it off at a recycling center. Job well done, maestro!