Learn how to quickly set up your MyQ garage door opener with these practical steps.
Key takeaways:
- Gather necessary equipment for smooth installation.
- Follow step-by-step instructions for initial device setup and mounting.
- Pair the hub with your garage door opener and test functionality.
- Link the hub with smart home devices for added convenience.
- Troubleshoot common issues and ensure safety precautions.
Equipment Checklist
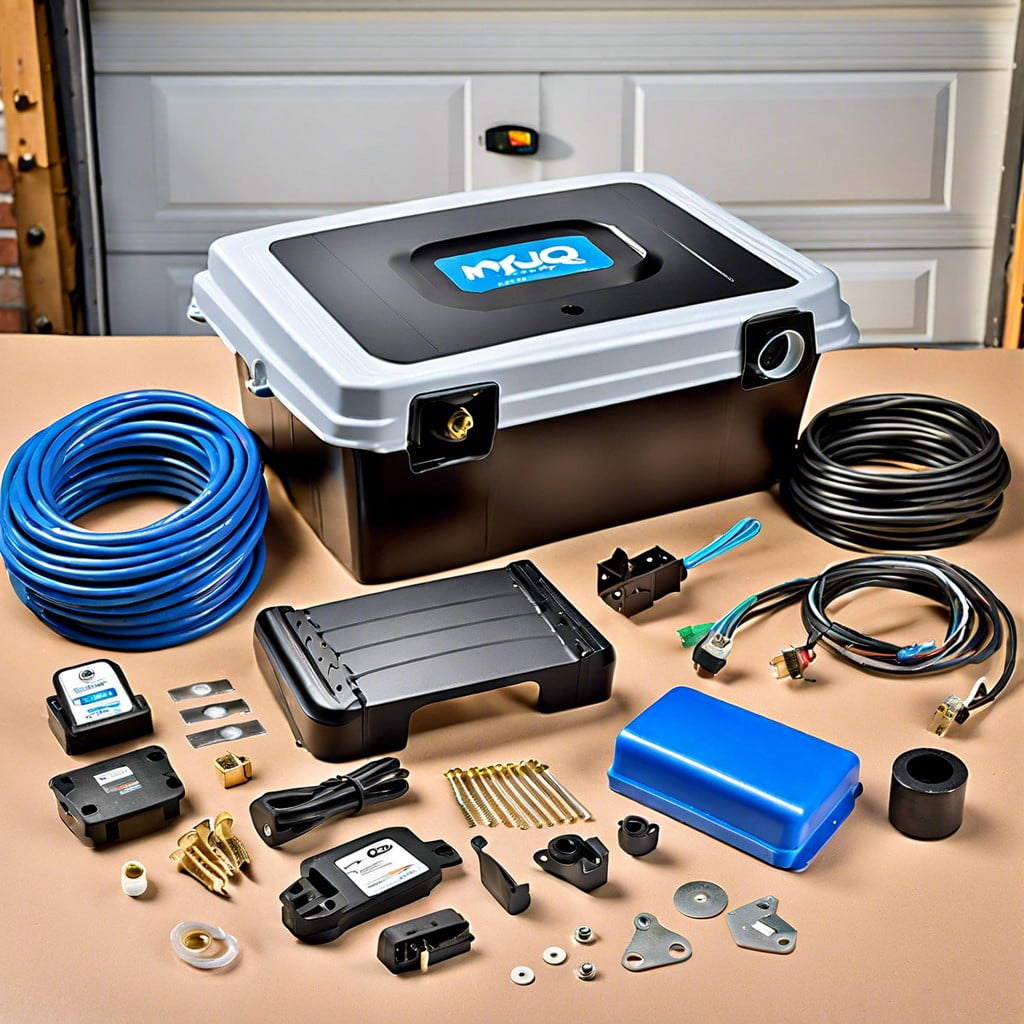
Before diving into the setup process, make sure you’re fully equipped for a smooth installation. You’ll need:
- The myQ Smart Garage Hub: This is the brain of your operation, enabling smartphone control.
- The myQ Door Sensor: Attached to your garage door; it communicates with the hub.
- A reliable Wi-Fi connection: Essential for linking your myQ device to the internet.
- A compatible garage door opener: Check your opener’s make and model for compatibility with myQ.
- Hand tools: Common tools like a screwdriver may be necessary for mounting the hub.
Double-check that you have these items at your fingertips. It’s like gathering your ingredients before baking a cake – it makes the whole process a piece of, well, cake.
Initial Device Setup (including Installing the MyQ App, Connecting to Wi-Fi, and Mounting the MyQ Smart Garage Hub)
Before diving into the nuts and bolts of the myQ Smart Garage Hub installation, make sure your smartphone joins the party. Step one is grabbing your phone and downloading the myQ app from your app store – it’s the brains of the operation.
Once the app is cozy on your phone, step two involves a digital handshake between the myQ Hub and your home Wi-Fi network. Open the app and follow the on-screen steps to connect – a process smoother than a hot knife through butter. Just make sure your router is within a good range to avoid any signal hiccup.
Now for step three, the physical bit. You’ll mount the hub within sight of the garage door opener – playing it safe, avoid placing it above your prized vintage car. The hub should be high enough to escape any accidental bumps but low enough for easy reach when the need arises.
After securing the hub to your garage wall or ceiling, give yourself a pat on the back. The tech groundwork is laid out, and you’re en route to a seamless garage door experience. Keep those tools handy though; the next stage beckons!
Pairing the Hub With Garage Door Opener and Testing Functionality
Once the myQ Smart Garage Hub is firmly affixed in place and connected to your home’s Wi-Fi network, the real magic happens. You’ll need your garage door opener’s brand and model on hand—this key info will simplify the pairing process.
Begin by pressing the ‘Learn’ button on your garage door opener—don’t worry, it’s usually front and center or under a nifty little access panel. Flashing lights or a beep confirms it’s ready to rendezvous with your myQ Hub.
Now, dash to the myQ app and follow the prompts. You’ll select your garage door opener’s brand and feed in any necessary details. It’s a bit like a first date – you introduce each other and see if they click.
After the formal introductions, it’s time for a trial run. Give your garage door a command via the app and observe. Does it obediently rise? Does it smoothly close? It should respond to your app’s call like a trusty canine to a dinner bell.
If it’s a no-go, double-check your steps. The devil’s in the details, as they say—revisit your opener’s ‘Learn’ button and give it another whirl. Patience is a virtue here; perfection takes a bit of tweaking.
Remember, during this process, safety isn’t just a suggestion—it’s a requirement. Ensure the path of the garage door is clear, and keep people and pets at a safe distance. We’re dealing with large, moving objects, after all.
Linking With Smart Home Devices
Seamlessly incorporating your myQ garage door opener into your smart home ecosystem amplifies convenience. With a few steps, you can have your garage respond to voice commands, or set up schedules and alerts based on your daily routine.
Picture this: a simple “Goodnight” to your voice assistant secures your home for the night, closing the garage door and turning off the lights. Here’s how you get your myQ device to play nice with other smart gadgets:
- Open the myQ app and find the menu.
- Select ‘Partner Integrations’ or a similar option.
- Choose your desired smart home service, like Google Assistant or IFTTT.
- Follow the specific prompts to link your accounts.
- Customize interactions through the smart service’s app for personalized automation.
Before diving in, remember that some features may require a subscription. Always double-check compatibility between devices to ensure smooth sailing. Think of these connections like best pals—when they get along, life’s a breeze.
Troubleshooting Common Issues and Safety Precautions
If your myQ garage door opener is acting like a stubborn mule, refusing to budge, let’s roll up our sleeves and tackle a few common gremlins that might be at work. First, check if the hub’s LED light resembles a disco strobe – this usually means it’s not getting a cozy Wi-Fi signal. Try moving it closer to your router or investing in a Wi-Fi extender.
Next up, if the door plays hide and seek and doesn’t open, ensure your device software is as fresh as morning coffee. An outdated app can throw a wrench in the works, so head over to the app store for a quick update.
Now, some garage door openers have an insatiable thirst for a specific type of frequency. If your myQ device seems to be speaking a different language, you might need to grab a necessary compatibility bridge. It’s like a translator for your opener and hub to get them chatting smoothly.
Remember, your garage door is a heavyweight champ. For safety, always keep the opener free from blockages and test the “Auto-Reverse” feature. Place a roll of paper towels under the door and close it. If it doesn’t reverse after contact, call in for reinforcement from a professional.
Lastly, for those days when nothing seems to work, check the power source. A simple unplug and replug after a minute can work miracles. It’s the tried-and-true “Have you tried turning it off and on?” trick, and let’s face it, sometimes that’s all it takes to kick things back into gear.