Learn how to replace a garage door bottom seal to keep out drafts, bugs, and water.
Key takeaways:
- Identify the right seal type for your garage door.
- Remove the old seal carefully using tools.
- Clean door bottom before installing the new seal.
- Install new seal snugly into the track.
- Test for leaks and adjust for a perfect fit.
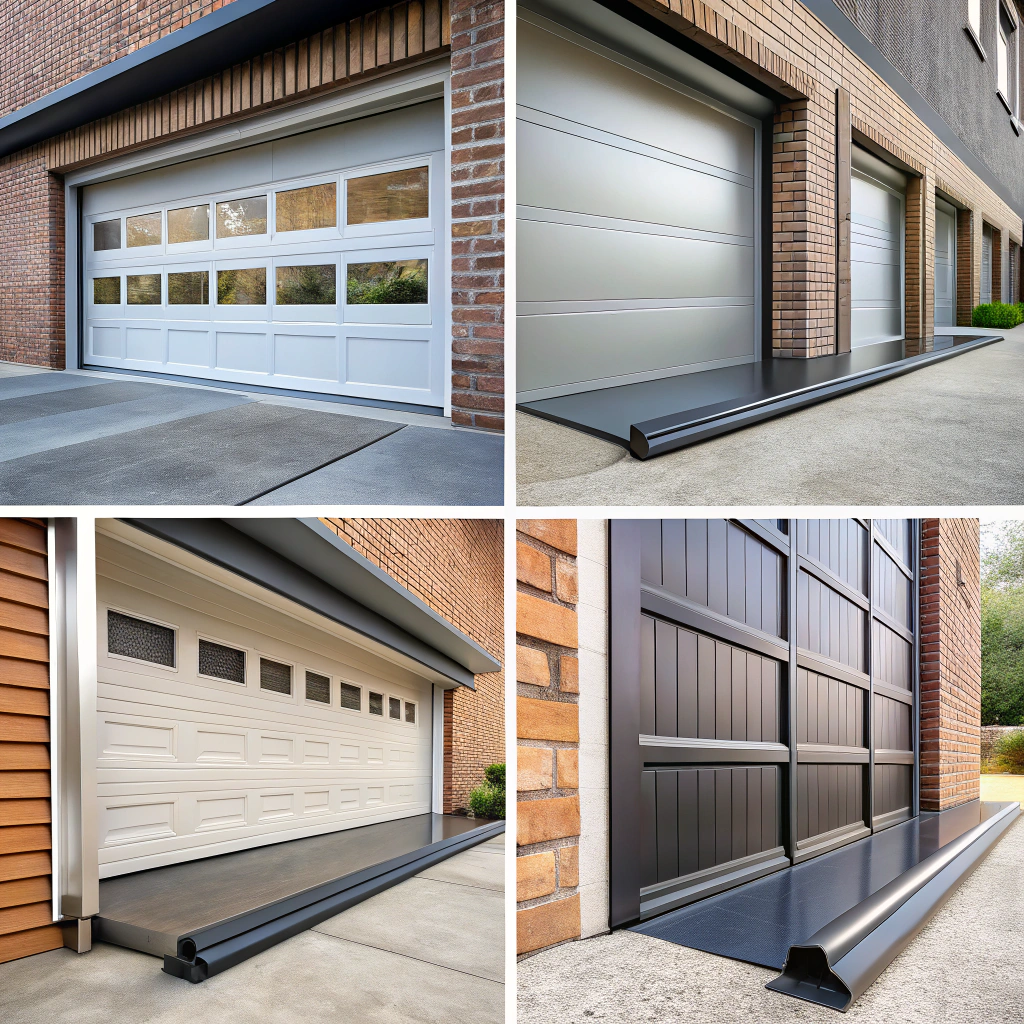
* Identifying the Right Seal Type
Selecting the correct seal is akin to choosing the right superhero cape—it makes all the difference. Here are some pointers to consider:
First, check your garage door’s groove profile. Is it a T-style, U-shaped, or something nutty called a bulb? Measure twice, identify once.
Consider the material. Rubber and vinyl both have redeeming qualities. Rubber’s the heavyweight champ against weather, while vinyl’s a cost-effective contender.
Climate is also a key player. Live where it snows like it’s trying out for the Winter Olympics? Opt for a heavy-duty seal.
Pay attention to color and aesthetics. After all, style points matter; just ask any fashion student. A sleek black, brown, or gray seal can complement most garage doors.
And remember, Google isn’t the only smart assistant in town. Consult your garage door’s user manual to avoid replacing your seal with something destined for another decade.
* Removing the Old Seal
First things first, grab your trusty screwdriver. Hopefully, it’s not hiding in the same dimension as those pesky unmatched socks. You’ll need this handy tool to loosen and remove any screws or nails holding the aged seal hostage to the door.
Next, a bit of elbow grease is required. This is the moment when you channel your inner superhero to pull the old seal out of its track. A little wiggling and jiggling might be necessary, like coaxing a cat out from under a couch.
If the seal is being extra stubborn, gently use a utility knife to cut away any remaining bits. Remember, we’re removing a seal, not reenacting scenes from a horror movie, so careful with those fingers.
Finally, sweep away any debris and grime. A clean workspace is a happy workspace, and you don’t want to introduce the new seal to the previous one’s dirty habits. Now, you should have a clean slate, ready for the next steps.
* Preparing the Garage Door
Before you dive into installing that shiny new seal, a little prep work is needed. Think of it as warming up before running a marathon—only less sweat and fewer curious glances from neighbors.
First off, unleash the broom! Clear any lingering debris and dust from the bottom edge of the garage door. Dust bunnies are cute, but they make terrible house guests.
Next, grab some soap and water. Wipe down the surface thoroughly and let it dry. Moisture is no friend here unless you want a slippery situation.
Inspect for any pesky splinters or nails poking out. These need to be dealt with swiftly, lest they poke holes in your brand-new seal. Remember, a seal with holes is just an enthusiastic sponge.
Lastly, ensure the door is completely dry. A damp door is just asking for trouble—or worse, mold antics. Once everything’s dry as your aunt’s meatloaf, you’re ready to proceed!
* Installing the New Seal
Once you’ve wrestled the old seal into submission, it’s time for the new contender to step into the ring.
- First, unroll your new seal. Make sure it’s longer than the door length. Extra length is handy, not unlike an extra slice of pizza.
- Align the seal’s groove with the bottom track or channel of your garage door. Like threading a needle, just more fun and less tedious.
- Feed the seal into the track, gently pulling it through. If your seal has a T-end, slide it effortlessly into the track until it’s snugly in place. No need to call in the heavy machinery.
- Finally, trim any excess seal with a sharp utility knife. Think of it as giving your garage door a trim, minus the gossip.
Test it by closing the door and ensuring there’s a snug fit without daylight sneaking in. Your garage should now laugh at drafts and sneer at unwanted critters. And just like that, you’re on your way to becoming the garage guru of the neighborhood!
* Testing and Adjusting the Seal
Once you’ve triumphantly installed the new seal, it’s time to ensure it’s doing its job—keeping the great outdoors where it belongs. Here’s how you can ensure that pesky draft bites the dust.
First, perform a visual inspection. Close the garage door and look for any light sneaking through along the bottom. If you can host a shadow puppet show, adjustments are needed.
Next, test its snug fit. Gently tug on the seal to ensure it’s securely attached. If it flaps around like a flag in a hurricane, tighten or reposition it.
Listen to your garage! Close the door slowly and listen for any suspicious crunching or squeaking. The seal should glide smoothly without sounding like it’s narrating a horror movie.
Finally, use a water test. Grab a garden hose and spray the exterior of the door. Check inside for any moisture making unauthorized entries.
Adjust as necessary to shield against leaves, drafts, and any uninvited amphibians looking for new property. Your seal should hold the line, no application needed for fortification duty.