You will learn how to reprogram your LiftMaster keypad quickly and easily.
Key takeaways:
- Locate the ‘Learn’ button on the opener.
- Enter a new four-digit PIN number.
- Test the new security code for functionality.
- Troubleshoot common keypad reprogramming issues.
- Maintain and secure your keypad for longevity.
Locate the Learn Button
Start by locating the ‘Learn’ button on your LiftMaster garage door opener. Sounds simple, but it’s like finding Waldo in a striped shirt factory.
First, get up close and personal with your garage door opener. The ‘Learn’ button is usually situated on the back or side of the motor unit. If you’re facing the motor and it feels like you’re staring into a technological abyss, don’t worry—you’re not alone.
You might need a step ladder. This button is often a bit of an overachiever, placing itself out of natural human reach. While you’re up there, take a moment to appreciate the engineering marvel that is your garage door opener.
Typically, the ‘Learn’ button will be near an LED light. Depending on your model, it might be under a light cover, so you might need to remove that. No, it’s not a cookie jar—don’t try to eat it.
The button itself can be different colors—red, green, purple, yellow—making it feel like a weird game of Simon. This colorful little rascal is your key to reprogramming bliss. Once you’ve found it, give yourself a pat on the back. Finding it is half the battle.
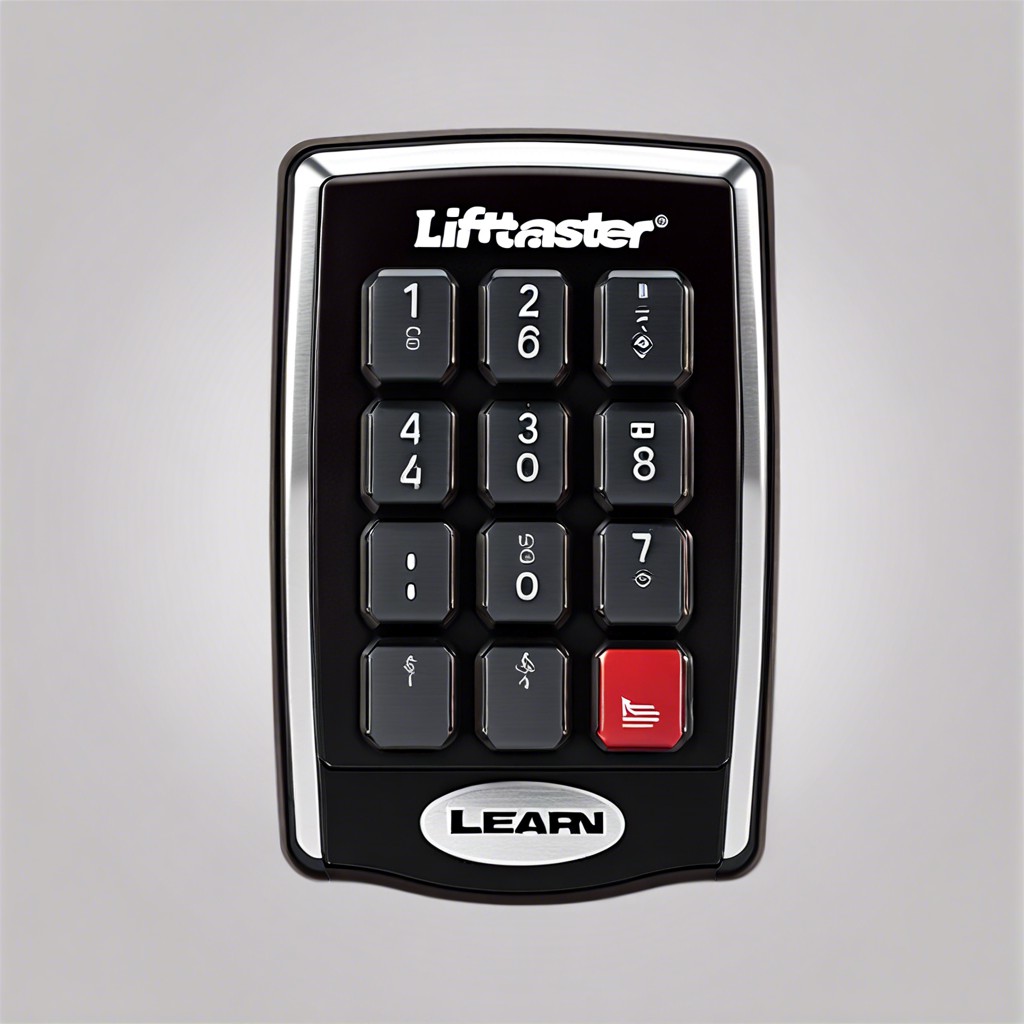
Enter a New Pin Number
Punch in a four-digit PIN of your choice. Think of it like setting a new secret code for your super-secret treehouse, but in this case, it’s to keep burglars out, not nosy siblings.
Press and hold the * and # buttons simultaneously until the keypad stops blinking. You’ll feel like a magician conjuring a spell as the blinking stops. Release the buttons and get ready to type like you have the world’s tiniest piano.
Type in your new PIN. Seriously, make it something you’ll remember. Your birthday, your pet’s name spelled backwards, or the number of times you’ve convinced yourself you’ll go to the gym this week (hint: just don’t make it “1234”).
Once you’ve punched in your numbers, press and release the door control button. Now, the magic really begins.
Finally, press 0 to exit the programming mode. Voilà! Your keypad now knows your secret code.
Test the New Security Code
Once you’ve punched in your freshly minted PIN, it’s time to see if it actually works. Don’t worry, no pop quizzes here. It’s just a one-step process to ensure your efforts weren’t in vain.
First, step outside, just like you’re about to impress the neighbors with your newly acquired tech skills. Close the garage door completely. Now, approach the keypad with the confidence of a tech wizard and enter the new code.
Watch like a hawk for the garage door to respond. If it opens smoothly, congratulations, you’ve done it! Should you encounter radio silence, pause, breathe, and revisit your steps. Just a minor hiccup, no need to call in the cavalry yet.
If it’s still being stubborn, retrace your steps to make sure everything was entered correctly. Your garage door might just be playing hard to get, and a second go might do the trick. Who says garages can’t have character?
Troubleshooting Common Issues
If the new code isn’t working, don’t panic, you’re not alone in the universe. Here are some common pain points and quick fixes to consider:
Make sure the keypad’s batteries aren’t playing hide and seek. A low battery can cause all sorts of mischief.
Check the distance between the keypad and the garage door opener. Sometimes moving just a bit closer makes all the difference.
Did you press the “Learn” button properly? If it wasn’t activated, the reprogramming might not have been successful.
Keep the area around your keypad clear of any electro-magnetic gremlins, like large appliances, which could interfere with the signal.
If all else fails, consult the garage door opener’s manual or consult the manufacturer’s website for model-specific guidance. There’s no shame in a little extra homework.
Tips for Maintaining and Securing Your Keypad
Keep your keypad clean and dry. Dust and moisture can mess with the electronics faster than a toddler with a permanent marker.
Change your PIN regularly. It’s not just for your email. Keep potential intruders on their toes by updating your security code every few months.
Check for loose wires. If your keypad starts acting possessed, it might just need a simple wire adjustment.
Keep an eye on the battery. No one wants to be locked out because of a dead battery. Replace it yearly or when the keypad starts acting sluggish.
Be mindful of who you share the code with. Your trusted friends and family don’t need to include the pizza delivery guy.