Discover the efficient and space-saving methods of hanging bikes in a garage to maximize your storage potential.
Hanging bikes in your garage can be a great space-saving solution and it’s easier than you might think. This article will guide you through the process, whether you’re looking to mount your bikes on the wall or hang them from the ceiling. We’ll cover everything from selecting the right bike rack, to ensuring your bikes are hung safely and securely. By following these steps, you can transform your garage into a tidy, efficient space, with your bikes neatly stowed away and easy to access. Stick around to discover all the details you need to make this project a success.
Key takeaways:
- Different types of bike storage ideas: wall-mounted, floor stands, ceiling storage, built-in shelves.
- Benefits of using a wall bike rack: maximizes vertical space, prevents damage.
- Proper use of wall hooks for bike mounting: select suitable site, consider weight distribution, install hook securely.
- Vertical bike storage on the wall: consider wall strength, choose appropriate space, use Delta Michelangelo Storage Rack.
- Horizontal bike storage on the wall: identify suitable spot, install mount securely, position bike correctly, protect wall, use additional hooks.
Understanding Different Types of Bike Storage Ideas

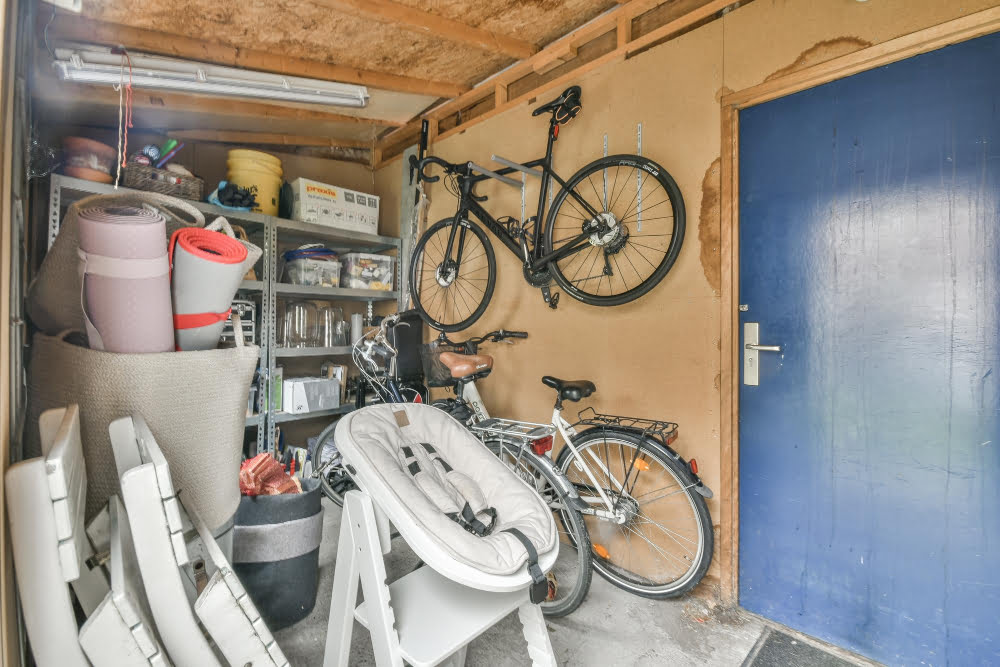
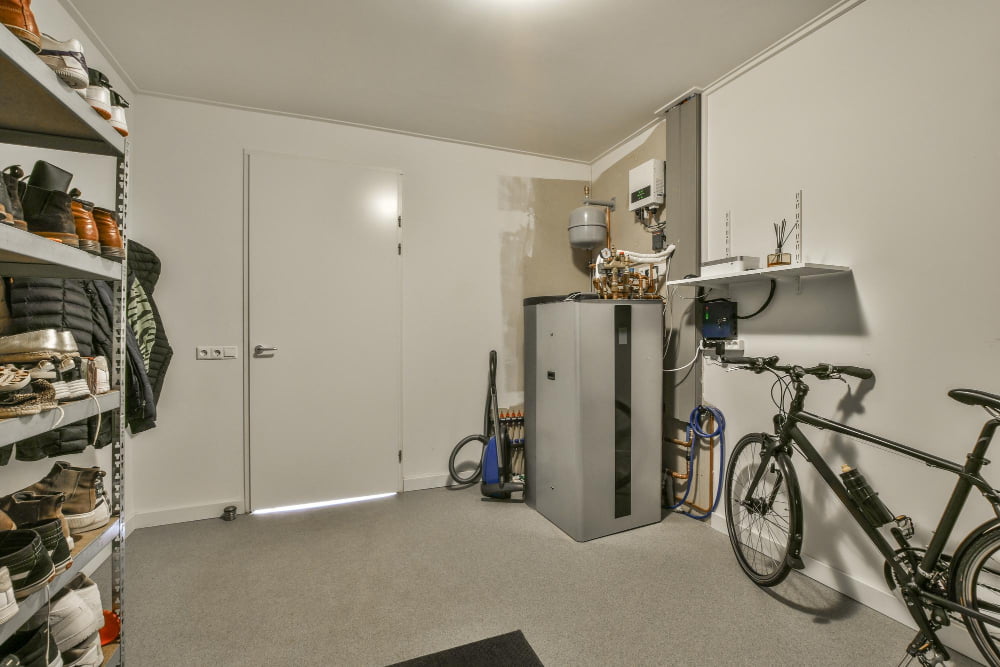
Bike storage can be quite diverse, depending on the layout of your garage and your specific needs. Firstly, wall-mounted options such as simple hooks or sophisticated adjustable racks provide an excellent way to store bikes out of the way. Vertical racks are ideal for narrow spaces as they use height rather than width. They can secure the bike at the tire, offering excellent stability.
Alternatively, horizontal racks are preferred when the room allows these ready-to-go solutions. They typically hold the bike at two points, such as the frame or the wheels, which minimizes the risk of falling.
Floor stands and display stands fall under the freestanding category and can be a portable solution. They also allow for easy maneuverability and require no drilling, making them ideal for rented spaces.
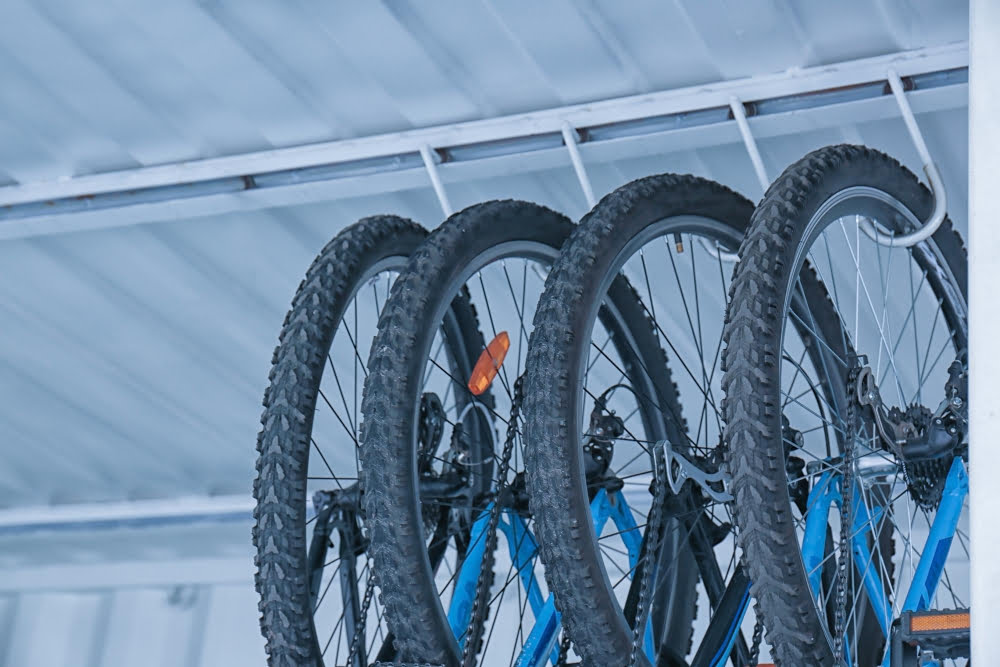
For garages with ample headroom, ceiling storage systems are a wise choice. You can either go for a basic hook style or invest in a pulley-operated system. Additionally, you can also hang bikes upside-down, a preferred method among many professional riders because of the ease it offers for maintenance tasks.
Built-in shelves are often ideal for people who prefer to keep things organized and in one place. They can be customized to fit into the design of the garage, providing additional space for helmets and other accessories. Lastly, for those on a budget, heavy-duty vertical hooks offer a cost-effective yet efficient way to store bikes.
Benefits of Using a Wall Bike Rack

Installing a wall bike rack in your garage offers several benefits. Firstly, it maximally utilises vertical space, freeing up the ground area for other storage needs or vehicle parking. Secondly, lifting bikes off the floor prevents potential damage from water leaks or vehicle movement. Also, with wall mount racks, accessibility is a breeze, readily visible, the bike can be quickly unhooked for a ride.
Additionally, from an aesthetic viewpoint, hanging bikes arrange them neatly, contributing to an organised garage look. Finally, wall-mounted racks are versatile, accommodating various bike sizes, models, and even other sport equipment. This adaptability makes it an ideal solution for multipurpose garages.
Proper Use of Wall Hooks for Bike Mounting
To mount bikes efficiently, wall hooks offer a tried-and-true solution. There are a few key factors to bear in mind for the best results.
Firstly, select a suitable site on your garage wall considering accessibility and avoidance of any obstructions. Most importantly, this should be an area with a stud behind the wall for secure fixture. Tools like a stud finder can greatly simplify this process.
Secondly, consideration must be given to how you plan to hang your bike. You may either hang it by the rim or the frame, but keep in mind the differing weight distribution of these methods.
Next comes the installation of the hook itself. Predrilling a small hole to guide your bike hook can be especially helpful and ensures secure installation. Safely screw the hook into your guide hole, ensuring it’s tightly affixed.
Finally, lift your bike and align it appropriately onto the hook. Test its stability by lightly shaking the bike. If you recall, wall hooks are considerably versatile, functioning perfectly with both vertical and horizontal storage strategies.
Remember, periodically check the strength of your wall hooks and adjust as necessary, ensuring your bike storage remains as safe and efficient as possible.
Exploring Vertical Bike Storage On the Wall

Vertical wall mounting offers a multitude of merits when it comes to storing bikes in the garage. This route doesn’t merely limit clutter but also ensures the bikes stay out of harm’s way.
For this, one should consider specific factors, such as the garage wall’s strength and material. If it’s robust and dependable, braces or mount brackets could be added to support the bike’s weight. A common method is using robust hooks that can be screwed into the wall at a height easy for the bike to hang vertically from its front wheel.
However, you will need a particular space to ensure that the bike doesn’t obstruct your garage’s traffic flow. Therefore, it’s crucial to measure accurately, keeping in consideration the bike’s length and leaving some clearance area for easy access to the bike.
While there are many adjustable products available in the market, the Delta Michelangelo Storage Rack provides an elegant solution. It leans against the wall – no screws required, and holds up to two bikes vertically. It’s also versatile and can adjust to accommodate different bike sizes.
Remember, the key is to organize the bikes in a way where they are easy to get and return. The system needs to be as simple as possible because if it’s a hassle, you’ll be less likely to use it.
Unpacking Horizontal Bike Storage On the Wall

Horizontal bike storage in a garage optimizes the use of wall space effectively and provides easy access to your bike. This method, often involving a wall mount, securely supports the bike at two points – the frame and the front wheel, making it particularly suitable for heavy or bulky bikes.
Here are few key points to keep in mind.
- 1. Identify a Suitable Spot: Look for a section of the wall that is large enough to fit the bike without interference from windows, doors, or other hanging tools.
- 2. Install the Mount: Fix the mount securely into the wall studs for stability to avoid your bike falling off and causing damage.
- 3. Position the Bike: Ensure the bike is level once placed on the mount. The frame should rest on the arms of the rack, allowing the bike to balance easily.
- 4. Make It Secure: Incorporate a locking mechanism if necessary, particularly if theft is a possible issue.
- 5. Protect the Wall: To maintain the garage wall, use a small tarp or wall protector beneath the bike to prevent tire marks.
- 6. Use Additional Hooks: Have hooks handy nearby on the wall for storing helmets, shoes, and other biking accessories.
Remember, safety comes first. Tools and detailed instructions usually accompany any purchased bike mount. Always double-check your work for a secure fit.
Steadyrack Classic Bike Rack – A Comprehensive Review
The Steadyrack Classic Bike Rack is revered for its unique design, ability to conserve space, and easy usability. Ideal for any garage, it employs a swivel action that allows storage on vertical and flat surfaces. This unique feature makes it seamless to navigate around parked bikes, removing the stress of potential damage.
Installation is straightforward and does not require advanced DIY skills. With inclusion of all necessary hardware, you can have it up in no time. The great thing about this model is that it caters to various bike types, making it versatile. Its accommodating dimensions (W 3.25″ x H 5″) allow it to comfortably hold bikes with a tire width up to 2.4″, and a wheel diameter ranging between 20″ to 29″.
Performance-wise, it stands as a robust and reliable storage solution. Crafted from steel and UV-treated plastic, durability is assured over a long-term usage. A load capacity of up to 77lbs further underpins its sturdy nature. Despite such strength, it maintains a sleek aesthetic that adds to the appeal of your garage.
Ultimately, the chief allure of the Steadyrack Classic Bike Rack lies in its ability to make bike storage in your garage as economic, effortless, and elegant as possible. It’s certainly an option worth exploring for any bike enthusiast.
How to Use the Rubbermaid FastTrack Garage Organization System
Ready for a practical solution? The Rubbermaid FastTrack Garage Organization System is a versatile option that simplifies bike storage. Here’s a step-by-step guide to help you get your bike organized quickly and efficiently.
1. Choose a clear wall space: Ensure it’s wide and tall enough to store your bike vertically.
2. Install the rail: This can typically hold up to 1,750 lbs when installed correctly. The FastTrack rail is horizontally positioned and secured with screws.
3. Add vertical attachments: Mount the vertical bike hook to the rail, ensuring it’s securely attached.
4. Position your bike: Simply lift your bike onto the hook, line up the front wheel, and house the bike vertically for increased floor space.
5. Adjust as needed: The hook can be moved along the rail for easy adjustment.
With the Rubbermaid FastTrack, your garage can become a tidy, organized space, making bike retrieval a breeze. Bear in mind this system is ideal for permanent storage, not for quick bike access. It allows for safe storage and is perfect for freeing up garage space. Now, let’s move onto another practical option: the Delta Cycle Adjustable Floor Stand.
Delta Cycle Adjustable Floor Stand – Unboxing and Installation

Inside the box, you’ll find the components neatly packaged for easy assembly. The parts include two adjustable arms, the base stand, cycle holders with rubberized grip, and necessary screws.
The unit is crafted out of durable metal capable of handling heavy duty use and daily wear and tear.
The installation process begins with assembling the base stand, followed by attaching the adjustable arms to their respective places. Firmly secure the arms with the provided screws. It’s the adjustable arms that enable the bicycle stand to accommodate different sizes of bikes, offering great flexibility for bike owners.
The cycle holders come with a rubberized grip, which not only ensures your bike is firmly held, but also prevents any damage to the bike frame.
Once the arms are attached to the base, position the cycle holders on these arms.
To put your bike on the stand, simply lift the bike and place the bike frame on the cycle holders. Adjust the holders if necessary for a secure fit.
Note that the Delta Cycle Adjustable Floor Stand offers single-sided accessibility, meaning you can only access or retrieve your bikes from one side, a point to consider based on your garage layout.
Garage Gator Motorized Bike Lift – A Detailed Guide
The Garage Gator Motorized Bike Lift is a versatile, adaptable solution that can lift and store not just bicycles, but also ladders and even canoes, saving you valuable floor space.
To use this innovative mechanism, simply attach your bikes to the hook bar and use the motor to lift them towards the ceiling.
Consider these key points:
- 1. The lift carries up to 220 pounds—an important fact to remember when deciding how many items it will hold.
- 2. Depending on the weight and size of the bikes, it can accommodate up to six of them.
- 3. It is crucial to ensure that the power cord is accessible from the unit without straining or stretching the cord, which can lead to damage.
- 4. It’s essential to have sturdy ceiling joists to install the lift—most residential garages have joists that can hold the bike lift securely.
- 5. The system comes with a lock mechanism for added safety—it ensures the bikes remain securely suspended even in the event of a power failure.
By mastering the Garage Gator Motorized Bike Lift, you can effectively maximize your garage storage space, giving your bicycles a secure, safe, and out-of-the-way storage solution.
DIY Bike Shelf – A Practical Guide
Building a bike shelf on your own requires simple stages of execution, and the outcome is especially rewarding for the DIY fans. The first step entails selecting your optimum design and choosing quality, sturdy wood for the shelf. A floating shelf model is opted for its simplicity and aesthetic appeal.
Accurate measurement of your bike’s dimensions ensures a well-fitted rack. Account for the handlebars and saddle height. Mark these on your wooden plank where the bike will rest.
With your cut-out design, sand down the edges for a clean finish. Drilling holes where you made the markings is the next step. Ensure to only drill halfway through the plank.
Installing the shelf onto the garage wall can be done using heavy-duty wall anchors. Make sure to use a level to maintain a straight line.
Finally, slide your bike’s top tube onto the shelf, and if done correctly, your bike should fit snugly. Safety is paramount with this design as it keeps the bike’s wheels off the ground, reducing the risk of accidental tipping.
Remember, a properly built bike shelf not only maximizes garage space but also acts as an aesthetic addition to your garage’s look. Take the time to paint or stain the shelf in colors that match or complement your garage’s interior.
RAD Cycle Gravity Bike Stand – In-Depth Analysis
Characterized by its ability to hold up to two bikes, the RAD Cycle Gravity Bike Stand uses gravity and the weight of the bikes to provide a stable storage solution. The setup process is simple, and it doesn’t require drilling holes into your garage walls – a bonus for those wanting to avoid structural damage.
Premium grade metal is used to construct this stand, ensuring it’s strong enough to hold the combined weight of two bikes. The rubberized feet prevent slipping, providing an essential reassurance that your bikes will remain safely standing.
The adjustable arms mean it can accommodate different types of bike frames. Moreover, the vinyl-coated arms are designed to protect your bikes from potential scratches and dents.
The cog-like design of the arms allows for different adjustments, making it a versatile choice for families with varying bike sizes. However, it’s important to balance the weight of the bikes evenly to avoid tipping.
This stand requires minimal floor space, which can be highly useful for garages where maximizing space efficiency is paramount. Given these features, the RAD Cycle Gravity Bike Stand is an ideal option for those seeking straightforward, reliable bike storage that doesn’t sacrifice floor space.
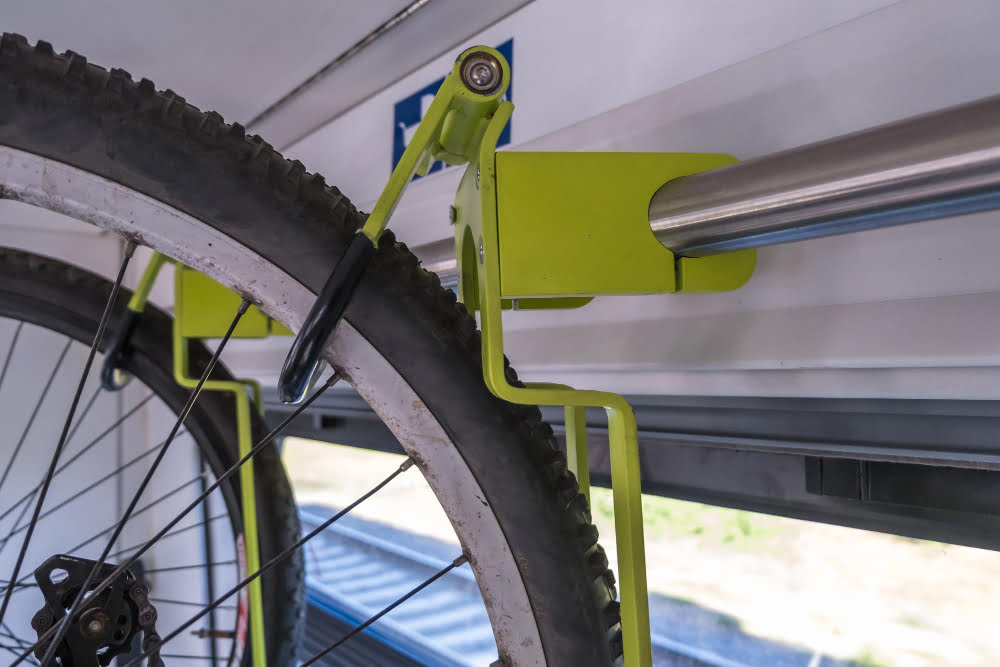
The Mechanics of Ceiling Bike Storage – Focusing On Pulley Systems and Ceiling Tracks
Pulley systems utilize a mechanism that reduces the amount of force required to lift a bike off the ground. Consisting mainly of a rope and a set of pulleys, this system allows the bike to be easily hoisted to the ceiling. A locking mechanism is often included to keep the bike securely in place once elevated.
On the other hand, ceiling tracks function differently. These involve fixed tracks mounted to the ceiling, onto which bike hooks are positioned. The orientation can be changed as per the user’s requirements, providing a flexible storage solution. The bike is lifted onto the hook and securely held in place by the track system.
Both setups maximize ceiling space and keep bikes out of the way, reducing clutter in the garage. However, it’s crucial to install these systems into the ceiling joists to ensure stability and safety. It requires more effort than wall-mounted options but offers outstanding space-saving benefits. The choice between pulley systems and ceiling tracks largely depends on personal preference and the specific layout of your garage space.
Saris Cycle Glide Ceiling Bike Rack – What You Need to Know
The Saris Cycle Glide is a convenient and efficient storage option, ideal for garages with high ceilings, making superb use of overhead space. This rack system glides smoothly, allowing for easy access to bicycles, regardless of your ceiling height.
Key Features:
- Scalable: It accommodates up to four bikes, thanks to its extendable design. Additional bike kits can be purchased if needed.
- Adjustable: Its sliding hooks cater to varying bike wheelbases, ensuring bikes of various sizes fit securely.
- High Weight Capacity: Each hook is capable of supporting a bike up to 50 lbs, offering robust housing for heavier cycles.
- Wheel Preservation: The cycle glide avoids direct contact with bike rims, helping to ensure longevity of wheels.
Installation: Installing the Saris Cycle Glide requires some precision and patience. Anchoring the ceiling rails into a stud is crucial for secure installation. Furthermore, while assistance is not necessary, having a helping hand could expedite the process.
Tip: This system also works well in spaces with slanted ceilings, offering expanded storage possibilities for unconventional garages.
Overall, the Saris Cycle Glide maximizes storage capability and provides a secure and adjustable solution for hanging bikes in your garage.
Delta El Greco Ceiling Hoist and Racor Bike Lift Pulley System – A Comparison
Both the Delta El Greco Ceiling Hoist and the Racor Bike Lift Pulley System offer similar solutions for ceiling bike storage, but each comes with its unique features.
The Delta El Greco option excels in its simplicity and high weight capacity of up to 50 pounds. A secure locking mechanism ensures the bike remains firmly in place once hoisted. A stand out feature is its ease of installation with straightforward instructions and user-friendliness, facilitating lifting tasks without excessive strength requirement.
On the other hand, the Racor Bike Lift Pulley System also possesses a robust design, able to support weights up to a staggering 100 pounds. The system’s unique feature is its pulley mechanism that equally distributes weight, reducing the effort required to hoist the bike. A secure lock ensures the bicycle stays suspended until it’s time for use again.
However, while Delta prioritizes simplicity, Racor goes a step ahead in ensuring reduced physical effort in the lifting process. Bear in mind, your selection would depend on your individual needs, such as weight capacity, ease of use, and available vertical space.
The Benefits of Hanging Bikes Upside Down

One of the considerable advantages of this storage method is maximizing space. By hanging your bikes upside down, you free up floor space and can neatly arrange several bikes along a wall without them overlapping or becoming tangled together.
Equally important is the reduced wear and tear on the tires. When bikes are hung by the wheels, gravity isn’t working against the pressure in the tires, helping to prolong their lifespan.
Additionally, this method can be advantageous for maintenance purposes. With your bike flipped upside down, it becomes easier to reach certain components when cleaning or conducting maintenance checks.
Lastly, this storage option can also enhance your bikes’ security. Hanging bikes upside down often requires more specific tools and knowledge, making them more difficult to steal if your garage were to be targeted by thieves.
Utilizing Built-In Shelves for Bike Storage

If your garage already comes with built-in shelves, these can be an effective solution for storing your bikes. Here’s how to utilize them efficiently:
1. Height Matters – A key factor is the height of the shelves; it should effectively accommodate the length of the bikes. If you have adjustable shelving, adjust it to the right level, ensuring the bike can rest securely.
2. Positioning of Bikes – Bikes should be stored horizontally and not vertically on these shelves. This prevents damage to the wheels and keeps the bikes stable.
3. Storage of Bike Accessories – This method also provides a dedicated space for storing helmets, bike pumps, and other biking accessories, keeping them conveniently accessible.
4. Additional Protection – If you are worried about scratches or scuff marks, consider adding a thin layer of protective cloth or rubber on the shelf surface where the bike comes in contact.
5. Wall Straps – For enhanced security, using wall straps is recommended. This assures that bikes won’t accidentally fall off, especially in an earthquake-prone area.
6. Convenience of Access – Finally, the bikes should be arranged in a way that allows for easy access, without the need to move other stored items around.
Installation of a Heavy Duty Vertical Bike Hook

To install a heavy-duty vertical bike hook, the first step is to locate a stud in your garage wall. Studs are the most secure points to hang your bike. You can use a stud finder for this task.
Next, choose the desired height for bike hanging and mark this spot on the stud. The standard recommendation is to hang the bike at about half the bike’s height, although this can vary depending on your garage specifications and personal preferences.
Once you’ve marked the spot, drill a pilot hole. Be sure your drill bit is slightly smaller than the diameter of the hook’s screw end to ensure a secure fit. After creating the pilot hole, twist the hook into place by hand until it’s firmly seated.
Regardless of the bike hook’s design, always hang your bike with its front wheel facing up. This positioning ensures optimal weight distribution and minimises potential stress on the bike frame. Engage a heavy-duty vertical bike hook with its intended load, maintain regular checks to ensure its continued stability.
The vertical bike hook is not only a practical storage solution but also a method of showcasing your bike. Its vertical orientation makes it a focal point in the garage, making it as much a part of the decor as it is a storage solution.
Choosing the Right Bike Storage Solution for Your Garage – Top Tips
Your storage solution should reflect the amount of available garage space. If you have limited floor area, vertical or ceiling options can help optimize space. However, if you have more ground space and less headroom, floor stands become viable options.
Utility is another critical factor. For frequent cyclists, an easy-to-access, straightforward system like a floor stand, wall hook or bike shelf is best. However, if you’re storing bikes for an extended period, consider ceiling hoists or pulley systems for their space-saving features.
Examine the durability and quality of the storage system. Steel construction with rubberized components can provide longevity and prevent bike damage. For heavy bikes, ensure the storage solution can handle the weight and is installed securely to prevent accidents.
Consider the number of bikes for storage. While individual wall hooks or floor stands work for fewer bikes, ceiling tracks or adjustable floor stands are beneficial for multiple bikes.
Evaluate the complexity of installation. While ceiling hoists and tracks offer excellent space optimization, they require more complex installation compared to wall hooks or floor stands.
Reflect on your budget. While elaborate systems like motorized bike lifts offer convenience, they can be expensive. Wall hooks, stands, and shelves generally represent more budget-friendly options.
Budget-Friendly Bike Storage Options – An Overview

Seeking budget-conscious solutions for your bike storage needs? Look no further!
1. Wall Hooks – A simple and cost-effective choice, wall hooks are both affordable and available in various sizes to accommodate every bike type.
2. Floor Stands – Perfect for the garage floor, these stands require no installation and are easily moved.
3. Pulley Systems – A little more complex, but still remarkably budget-friendly. Remember, ceiling storage is an excellent space-saving solution.
4. DIY Racks or Shelves – A bit of creativity using materials in your garage can lead to a practical, no-cost solution.
5. Adjustable Bike Stands – These stands are often moderately priced and offer flexible storage options, accommodating bikes of various sizes and types.
6. Vertical Bike Hangers – An economical option, these easy-to-install bike hangers save tremendous floor space.
It’s crucial to take into account your garage’s size, the number of bikes to be stored, and the need for easy access when choosing a budget-friendly bike storage option.
FAQ
Is it OK to hang bikes by their wheels?
Yes, it is perfectly fine to hang bikes by their wheels as the design of the wheels enables them to withstand loads far exceeding the weight of the bike.
How to safely store bikes in garage?
To safely and space-efficiently store bikes in your garage, install two rubber-coated metal hooks in the ceiling ensuring there’s enough clearance for your car, and suspend your bike from them.
What is the best way to hang a bicycle?
The best way to hang a bicycle is by using vinyl coated bike hooks on your garage or shed wall for organization and space optimization.
What types of bike storage racks are recommended for garages?
Recommended bike storage racks for garages include wall-mounted hooks, freestanding racks, pulley systems, or ceiling-mounted hoists.
How much vertical space should be allotted for a hanging bike in a garage?
A hanging bike in a garage requires a minimum vertical space of approximately 4 feet to allow for convenient storage and access.
What factors should be considered when picking a location for bike storage in a garage?
When selecting a location for bike storage in a garage, factors such as space availability, convenience of access, potential for damage or theft, and conditions contributing to wear and tear should be considered.