Unveiling the various factors, this article provides a comprehensive breakdown of the costs involved in epoxying a garage floor.
The cost of epoxying a garage floor can vary widely based on several factors, including the size of the garage, the type of epoxy used, and whether you hire a professional or do it yourself. On average, homeowners spend between $1,200 and $2,400 for a professional epoxy coating. However, if you’re up for a DIY project, the cost can be significantly reduced to around $200 – $600. This article will delve into the specifics of these costs, providing a comprehensive guide to help you budget your garage floor epoxy project accurately.
Key takeaways:
- Cost range: ,200 – ,400 for professional, 0 – 0 for DIY.
- Garage size affects cost: larger garage requires more epoxy.
- Types of epoxy: water-based, solvent-based, 100% solid-based.
- Materials and equipment needed for epoxy application.
- Labor cost varies based on pricing model and complexity.
Garage Size
Garage size significantly influences the overall cost of an epoxy floor application. Generally, epoxy is priced per square foot so a larger garage will inevitably require more material, impacting the final price.
For a standard two-car garage, which typically measures around 400-600 square feet, homeowners can expect on average to use less epoxy than a three-car garage, which may be 600-800 square feet. This is a primary factor to consider, as the quantity of epoxy directly correlates with the total project expense.
Remember, a precise measurement of your garage area will ensure an accurate estimate of required epoxy, avoiding unnecessary surplus or shortfalls.
Type of Epoxy
Upon deciding to apply an epoxy coating, understanding the different variations is key. At the most basic level, there exist three types: water-, solvent-, and 100% solid-based.
Water-based epoxy is an affordable and user-friendly option. It has a lower level of volatile organic compounds (VOCs), offering a safer experience during application. However, due to its thinner consistency, it may necessitate several coats to achieve the required durability.
Alternatively, solvent-based epoxy offers a thicker consistency and stronger bond, hence providing a highly durable finish. Although it boasts superior adhesive qualities, its higher VOC content translates to more robust fumes during application, making proper ventilation essential.
100% solid-based epoxy is the premium option, providing the toughest and most long-lasting finish. Without any volatile solvents, it is the purest form of epoxy, known for its superior resistance to chemicals, impact, and abrasion. Despite these benefits, it requires a precise installation process, which may involve professional help, and is usually the priciest option.
Remember, each variant offers unique pros and cons, thus inviting the importance of matching the choice to both usage requirements and budget allocation.
Materials and Equipment
Attention to the right materials is paramount when considering garage floor epoxy. The market offers plenty from which to choose, ensuring compatibility with varying budgets and aesthetic preferences.
An essential component is the epoxy formulation itself, which can be either solvent-based, water-based, or 100% solid. Each type provides unique finishes and durability levels. The volume required depends directly on your garage’s square footage and the product’s coverage rate. Make sure to consider these factors when choosing the type of epoxy suitable for your needs.
Not forgetting the primers and sealers. An epoxy primer helps the epoxy bond better to the concrete, while a polyurethane or polyaspartic top-coat enhances the floor’s resistance to chemical spills and yellowing.
In terms of equipment, investing in a high-quality roller and brushes is imperative to achieve a smooth surface. A spiked roller comes in handy to remove trapped air bubbles thus ensuring an even spread.
Lastly, a concrete grinder or acid etching kit might be necessary for surface preparation before epoxy application. This equipment aids in roughening the surface to allow secure adhesion of the epoxy. Despite their upfront cost, these tools can be an asset, especially for DIY enthusiasts.
By focusing on the quality and suitability of materials and equipment, epoxy application becomes a smoother process, translating into stunning results.
Labor Cost
Determining labor costs depends largely on the contractor’s pricing model, either by hour or square footage. For an hourly rate, expect to pay anywhere between $30 to $50. Should they charge per square foot, the range starts from $3 to $12.
A few of the variables impacting these charges include your region’s cost of living, the contractor’s level of expertise, and the complexity of the project, such as surface preparation or utilizing intricate design patterns.
Keep in mind that professionals often include prep work and materials in the overall cost, providing value for money. It’s essential to get quotations from multiple contractors for a broader perspective on the pricing landscape.
Ensure to clarify what these costs encompass, such as whether topcoat or sealant application, as well as post-installation cleaning, are included. Furthermore, ascertain if the contractor offers a guarantee or warranty on their workmanship for added peace of mind.
Application Method
There are typically three different application methods for epoxy – roll, squeegee, and spray. The roll method involves a paint roller and is the most common DIY approach. It’s straightforward, user-friendly, and cost-effective but may not give a seamless finish.
Squeegee method, on the other hand, provides a more uniform application. It requires spreading the epoxy across the floor using a squeegee, then back rolling to even it out. The technique is quick and ensures full floor coverage, but it requires a bit more skill than rolling.
Lastly, professionals often use the spray method. It offers an incredibly smooth finish and fast drying times. However, it requires special equipment and considerable expertise, making it the most expensive option out of the three.
Each method has its advantages and drawbacks, all of which should be considered in parallel with the specific requirements of your epoxy floor project.
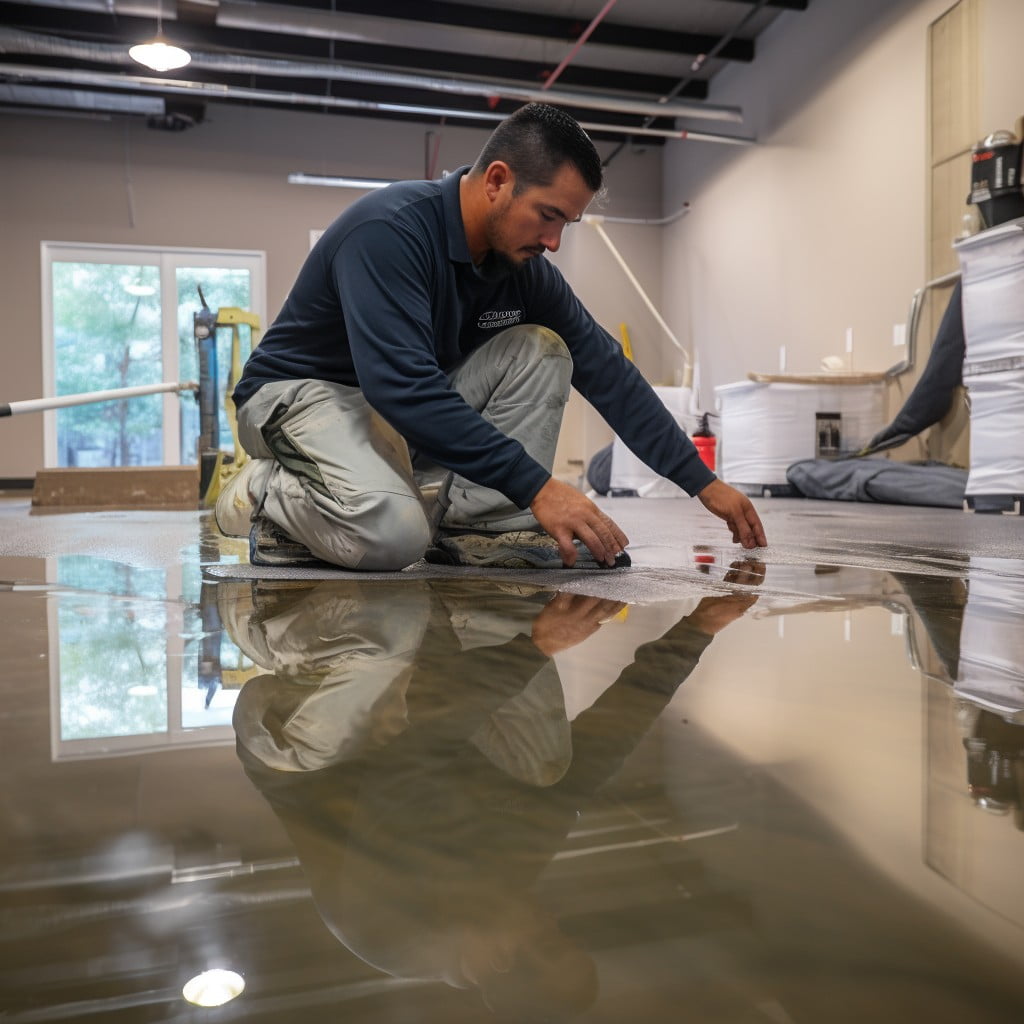
Site Preparation
Before epoxy application commences, thorough cleaning is mandatory to ensure the coating bonds perfectly with the concrete surface. This involves sweeping, vacuuming, and power-washing to rid the floor of dirt and dust particles. Stains, such as oil or grease, must also be removed to allow optimal adhesion. Such tasks can be accomplished utilizing commercial degreasers or other appropriate cleaning solutions.
Equally critical is the process of etching – applying a mild acid solution to open up the concrete pores. This step is necessary as it enhances epoxy penetration, increasing the longevity of the coating. Care should be taken to rinse fully and allow adequate drying time post etching.
For aged or previously coated surfaces, grinding might be required to remove old coatings or smooth out uneven areas. This can be labor-intensive and might require professional assistance for the most effective results. Remember, the quality of site preparation directly affects the outcome of the epoxy floor project.
Additional Costs and Considerations
While the main elements affecting the cost of epoxying your garage floor include the type of epoxy used, the size is your garage, and the labor involved, there are some additional aspects that could add to the final bill.
Firstly, any repairs needed for your garage floor can significantly increase the overall costs. Filling cracks, fixing chips, or levelling uneven areas will require extra time and materials before the epoxy installment begins.
Secondly, whether you opt for a simple solid color or decide to get creative with decorative chips or a metallic finish will influence the price. The latter would require additional materials, and consequently, added labor fees.
Thirdly, installing a moisture barrier, particularly in humid climates, will prevent the epoxy from peeling or bubbling, invariably an essential investment to prolong the garage floor’s lifespan.
Lastly, you should consider the indirect cost of relocating your vehicle and garage belongings in case the installment process takes several days. Secure storage or alternative parking places may come with an added expenditure.
Water-Based Epoxy
With a lower percentage of solids, or epoxy, water-based formulas dilute the material, making it easier for DIY enthusiasts to utilize. They’re less toxic, meaning they have fewer volatile organic compounds (VOCs), creating a safer working environment, as well as an environmentally friendlier choice. Despite the lower solids content, these formulas still provide a sturdy, durable finish, adequately protecting the floor from stains, abrasions, and chemical reactions.
Application is also user-friendly: the mixture is straightforward, with the product easily spreading out on a floor using typical painting methods. It’s ideal as an economical option for low-traffic areas as it does not yield the same high-gloss finish as solid alternatives, a fact that might underwhelm those seeking maximum shine and depth in the garage flooring aesthetics.
Solvent-Based Epoxy
Boasting superior adhesion properties, solvent-based epoxy floor coatings penetrate concrete surfaces more efficiently. This leads to a more durable finish, significantly prolonging the lifespan of your garage floor.
These coatings, however, have higher volatiles content – compounds that, once released into the air, can present health risks due to their high toxicity. Proper ventilation during the application process is therefore vital. A respirator is also recommended while using this type of epoxy.
Its finish can be customized with decorative chips for enhanced aesthetics, and multiple layers can be applied to obtain the desired thickness.
Despite its elevated performance attributes, the higher price point of solvent-based epoxy compared to water-based alternatives may be a drawback for some homeowners.
Solid Epoxy
With a higher degree of robustness, Solid Epoxy indeed stands up to everyday garage usage. Defined by its chemical formula as virtually pure epoxy, it doesn’t dissolve and contains fewer volatile organic compounds, making it safer for your health. Its distinctiveness hinges largely on the two parts that comprise it: epoxy resin and polyamine hardener. When blended, these create a tough, highly resistant surface, second to none in wear and tear resilience.
Solid epoxy surfaces are marked by an attractive high-gloss finish, often customizable to your preferred color. Its dense composition helps to cover minor imperfections on the floor, giving an impressive and renewed outlook.
Although known for its longer setting time, the resultant coating lasts significantly longer and proves resilient to common garage spills, from motor oil to anti-freeze. This makes solid epoxy an excellent choice for those seeking a durable, aesthetic, and reasonably priced solution for their garage floor.
Epoxy Garage Floor Cost: DIY Vs. Hiring a Professional
Choosing between a DIY project and hiring a professional can affect the cost significantly. Performing the job yourself can save labor costs, but it requires a time commitment and confidence in your abilities to handle materials and equipment correctly.
A DIY epoxy kit can range from $50 to $600, depending on the square footage of your garage and the type of epoxy you choose. Keep in mind these kits usually do not include the necessary preparation materials, which could add another $50 to $100 to your overall costs.
Hiring a professional, on the other hand, typically starts around $3 per square foot and can go up to $12 per square foot, depending on the complexity of the job and the quality of the materials. This cost includes labor, materials, and preparation. Hiring a professional ensures a high-quality finish and can help avoid potential mistakes that can come from inexperience.
Make sure to weigh the costs and benefits of each option to determine the best choice for your garage and budget.
Pre-Installation Considerations
Before starting the epoxy application process, there are several factors to take into consideration. The first and most important one is examining the current condition of your garage floor. Is it bare concrete or does it have an existing coating? If it’s bare, check for oil stains, greases, or dirt — these must be dealt with correctly, as epoxy doesn’t adhere properly to dirty or oily surfaces.
Existing cracks or chips also need to be repaired as they might preclude a smooth finish. Consider buying a concrete patching product to fill these in. Moisture too, can affect the durability of your epoxy coating, it is then necessary to perform a moisture test.
The temperature of the room can significantly influence the curing time of the epoxy. The ideal temperature for applying epoxy is between 60 and 80 degrees Fahrenheit. If it is too hot or cold, the epoxy might not cure correctly.
Recognize that proper ventilation is necessary when applying epoxy. The strong smell can be overwhelming, opening garage doors and windows is advisable to allow airflow.
Further, you need to arrange an alternative storage area temporarily for your vehicles and other stored items in your garage during the installation process. The floor will need to be free from obstructions and you should also allow ample time for the epoxy to dry thoroughly before moving items back in.
Bare Concrete Prep Methods
Before applying an epoxy coating, it’s essential to properly prepare the concrete surface. This process may involve several steps:
1. Cleaning: For the epoxy to bond correctly, any oil, grease, or dust accrued over time must be thoroughly removed from the surface.
2. Moisture Testing: Concrete must fall within an acceptable humidity range for effective coating adhesion. There are several moisture tests, such as the Calcium Chloride test or the Plastic Sheet Method.
3. Concrete Etching: A solution, commonly muriatic or phosphoric acid, is used to ‘etch,’ or roughen, the surface, improving the epoxy’s adherence.
4. Crack Repair: Any cracks or pitting should be repaired using a suitable filler before applying the epoxy.
5. Surface Drying: After cleaning and repair, ensure the concrete is completely dry before moving forward with the application process.
Repairing Concrete
Before any epoxy application, addressing concrete imperfections is paramount. Cracks and crevices, for instance, will need to be filled using an epoxy patch, which can range from $30 to $50 per gallon. Pitted or spalled areas might require full-depth repair, an operation that demands an epoxy mortar. This can add another $100 to $200 to the overall cost. Degreasing the surface is also a necessary step if oil or grease stains are present, as this ensures proper epoxy adhesion. The cost of a quality degreaser lies in the region of $35 to $45 per gallon. It’s worth mentioning that proper repair contributes not only to the aesthetics, but also to the longevity of your epoxy floor.
Resurfacing Concrete
Before applying epoxy, a crucial step involves resurfacing your garage floor, ensuring a smooth surface for optimal adhesion. This process often includes a combination of cleaning, repairing cracks, and leveling the concrete. Removing oil spots, grease, and older coatings is vital for a successful application.
Repairing cracks is also a must. Small cracks can be filled with an epoxy paste, while larger ones may require concrete patching compounds.
For uneven garage floors, resurfacing may involve grinding down high spots and filling in low spots with a self-leveling compound. This will not only enhance the longevity of the epoxy coating but also improve the overall appearance of your garage floor.
However, bear in mind, this stage can be labor-intensive and needs extreme attention to detail. Skimping in this process can lead to an unsightly finish and potential peeling down the line.
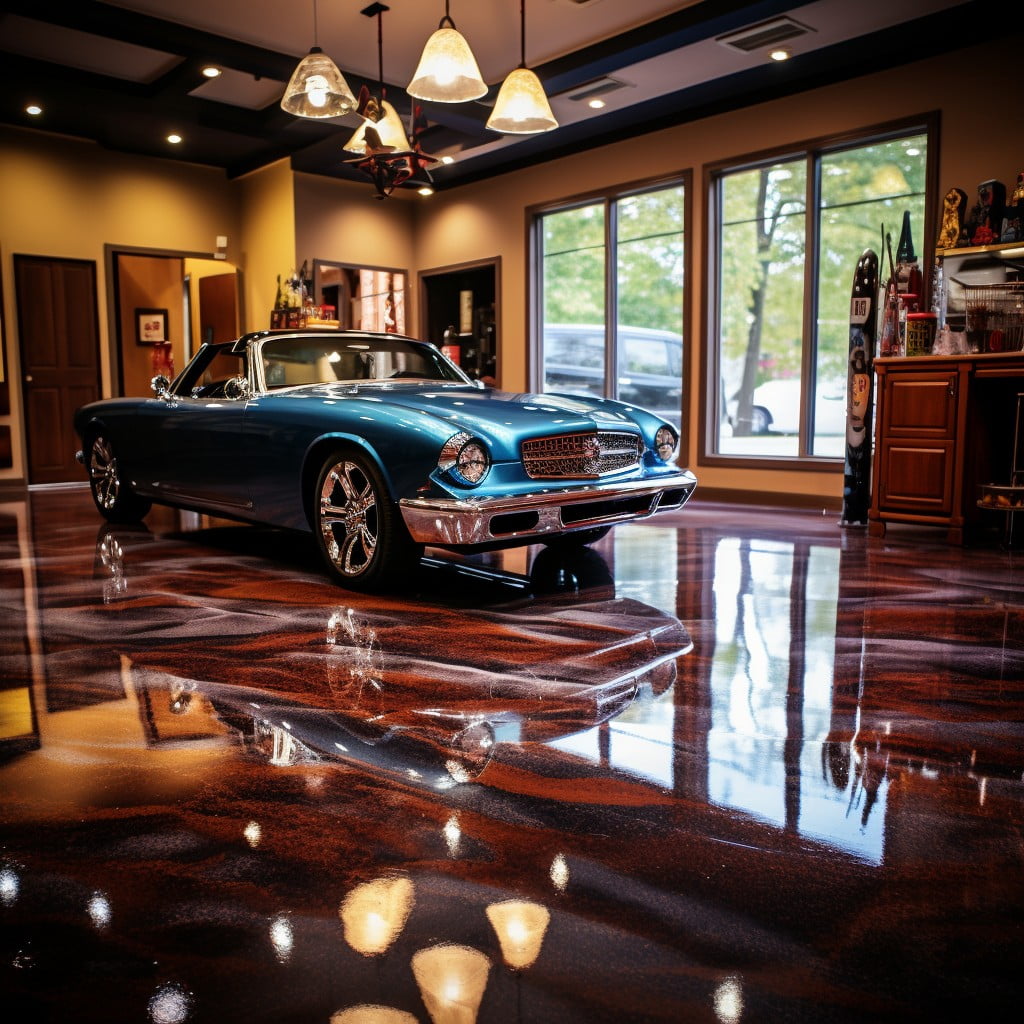
Solid Color Epoxy Floor
Available in a variety of hues, solid color epoxy floors are among the most common styles chosen by homeowners. Aesthetically pleasing, these floors provide a clean and polished look to any garage. The application involves the use of a single color throughout the entire garage floor area, lending uniformity to the design.
What sets them apart is their ease of maintenance. These floors resist stains from oils, chemicals, and other garage-related substances. Sweeping and mopping prove sufficient for regular upkeep and the occasional spill can be cleaned without a fuss.
Another top-notch feature is durability. The solid color epoxy floor withstands heavy foot and vehicle traffic and can last up to 10-20 years depending on care and garage usage.
Finally, think about light reflection. These floors have a natural shine that can brighten up a usually dull garage space. This could potentially reduce the need for additional garage lighting and provide energy savings in the long run.
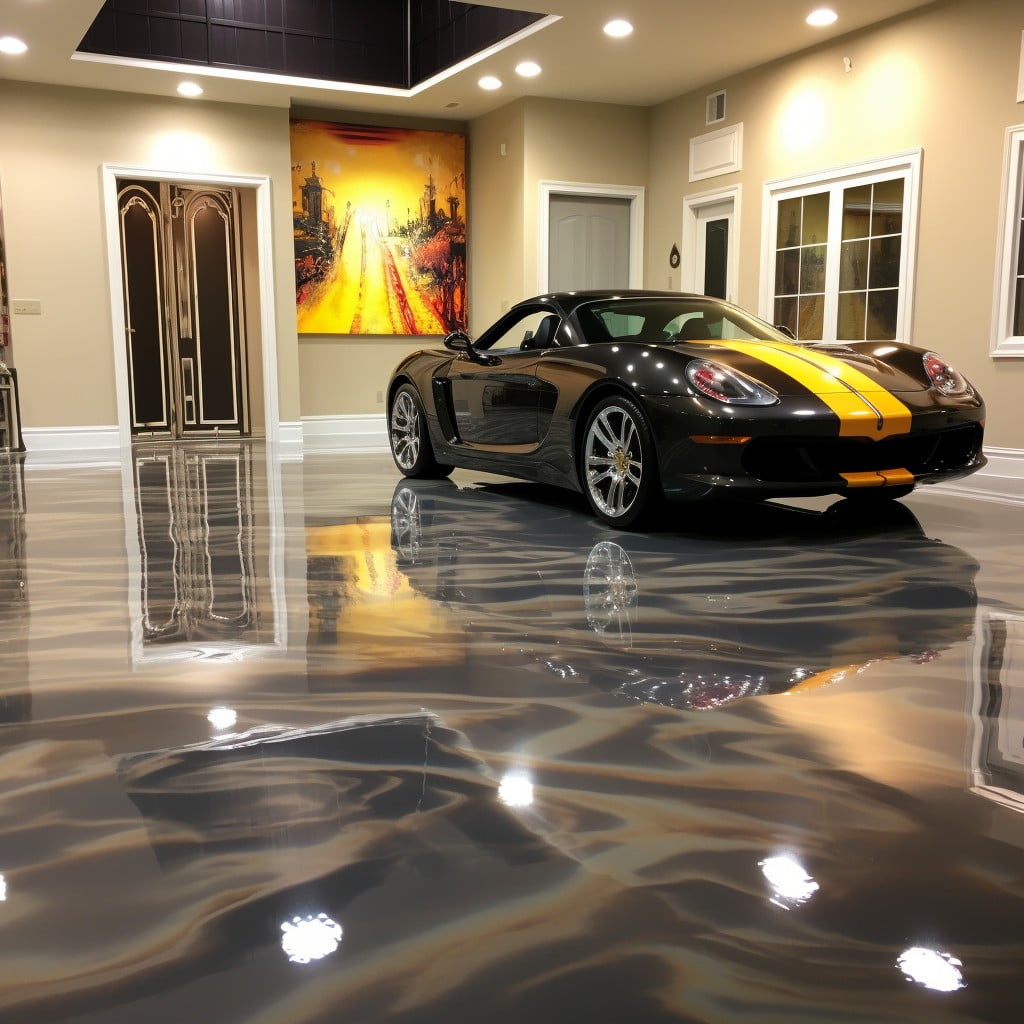
Metallic Epoxy
Known for its stunning aesthetic appeal, metallic epoxy brings a unique, three-dimensional look to your garage floor. Achieved by mixing metallic pigments into clear epoxy, this finish results in swirls and patterns that mimic scenes from nature, such as molten metal, ocean waves, or even a starry night.
Diverse in its appearance, metallic epoxy includes a myriad of color combinations to perfectly match your style. From bold blues and fiery reds to soothing greens and neutral grays, there’s a shade for every design palette.
However, bear in mind – this type of epoxy requires a higher degree of skill to apply correctly, so it’s best left to professionals. It also tends to be pricier than other options, but for many, the unique, eye-catching finish is worth the extra investment.
Durability is another strong point for metallic epoxy. Along with its distinctive look, it also offers robust resistance to wear and tear, staining or damage due to chemicals – an ideal choice for heavily used garages.
Remember, to maintain its gloss and keep it looking its best, it should be topped with a high-grade clear epoxy or polyurethane. This step not only enhances the life span of your floor but also its resistance to yellowing due to sun exposure.
Moreover, metallic epoxy, despite adding a touch of luxury to your garage, it remains an environmentally friendly choice, producing low emissions during installation and containing no harmful solvents.
Finally, metallic epoxy is not just for those looking to add artistry to their garages – it’s also a practical solution, combining visual allure with superior strength and durability.
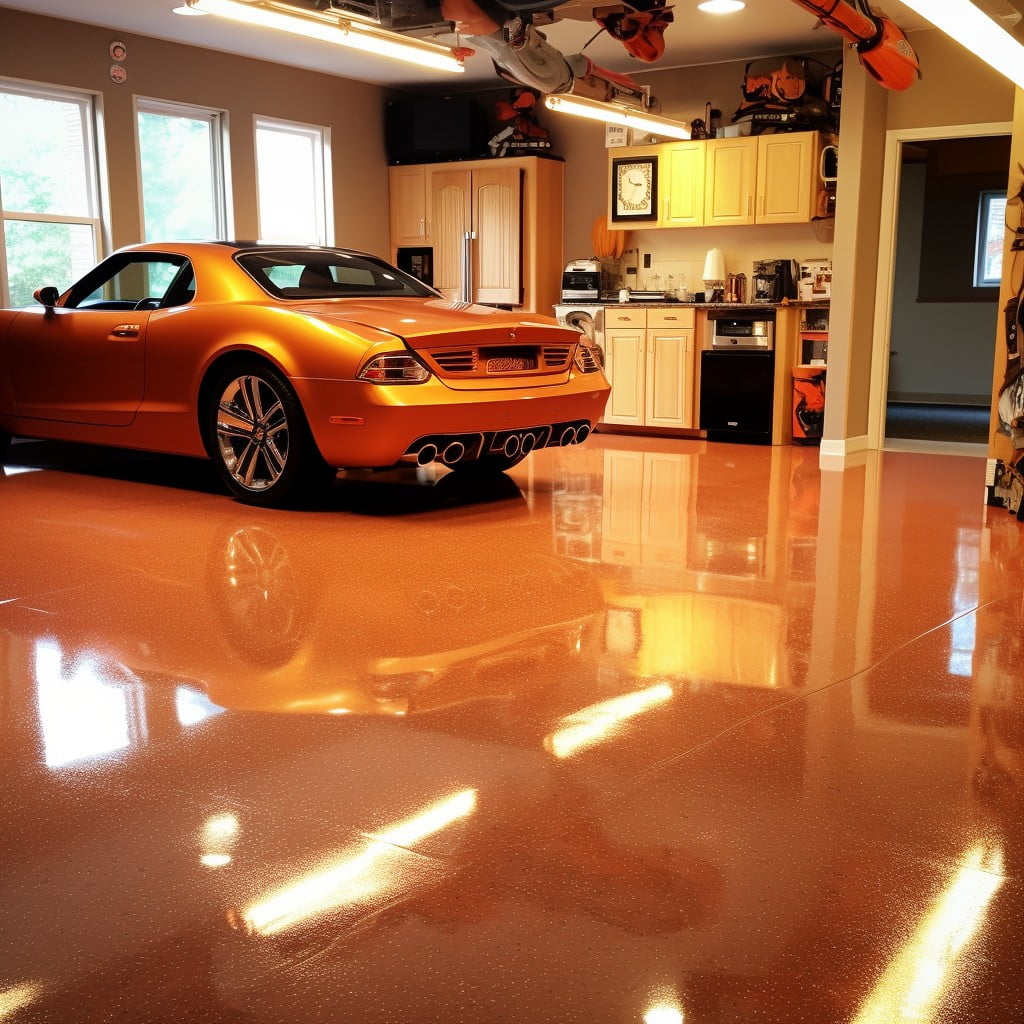
Full Broadcast Epoxy Floor
Offering a high level of durability and visual appeal, full broadcast epoxy flooring provides an ideal solution for effectively enhancing the aesthetics of your garage. This option involves scattering decorative chips or quartz throughout the initial epoxy coating, then sealing everything with a clear topcoat.
Its benefits include:
- 1. Durability: The extra layer from the decorative chips lends added strength, standing up to heavy vehicles, tools, and chemical spills.
- 2. Slip Resistance: The textured surface supplied by the chips or quartz enhances slip resistance, a crucial safety feature in a work area.
- 3. Customizability: Multiple colors and patterns of chips are available, enabling you to design a bespoke garage floor that suits your aesthetics.
- 4. Easy Maintenance: Epoxy flooring is naturally resistant to dust, dirt, and stains; therefore, cleaning your garage is a breeze.
- 5. Long-Lasting: Given its strength and resistance, this flooring option holds up well even in heavy usage, providing long-term attractiveness and service.
When considering full broadcast epoxy flooring, remember that the cost tends to be higher due to the increased labor and materials involved. But, it’s an investment likely to return dividends in durability, maintenance, and aesthetic appeal.
Storing Possessions During Installation
During the installation process, your garage will be off-limits. Consequently, it’s important to consider where you’ll store the items typically housed in this space.
Outdoor storage sheds provide a convenient option, especially for larger items like bicycles, lawnmowers, and outdoor tools.
Smaller items might find temporary homes in your home’s basement or attic.
Renting a storage unit for a short period could also be a beneficial solution, especially if you have high-value items that require secure, climate-controlled conditions.
Ensure all items are properly protected from potential damage during their temporary relocation.
Lastly, remember it’s an ideal time to declutter and possibly discard unnecessary items to make for a more orderly garage once the flooring project concludes.
FAQ
Is it worth it to epoxy garage floor?
Despite its common usage, epoxy coating for garage floors might not be the best choice due to its weakness to exterior elements, resulting in potential adhesion issues and subsequent peeling, chipping, and delamination over time.
What is the downside of epoxy garage floor?
One major downside of epoxy garage floors is their non-porous nature, which makes them slippery when wet, posing a potential risk for the elderly or small children.
How much does it cost to coat the floor of a 2 car garage?
The cost to coat the floor of a two-car garage typically ranges from $3,500 to $5,500, with the exact price depending on specific factors related to the concrete coating project.
How long will epoxy garage floor last?
An epoxy garage floor, when properly maintained, can last from 10 to over 20 years.
What factors influence the cost of epoxy garage flooring?
The cost of epoxy garage flooring is influenced by factors including the floor's square footage, the complexity of the job, the quality of the epoxy, and whether or not professional installation is required.
How does the quality of epoxy affect the longevity of the garage floor?
The quality of epoxy directly impacts the longevity of the garage floor, as high-quality epoxy creates a durable, high-gloss surface that can last many years, whereas low-quality epoxy can lead to peeling, chipping, and fading much more quickly.
What maintenance is required for an epoxy garage floor?
Epoxy garage floors require regular sweeping, occasional wet mopping with a mild detergent, and immediate cleaning of any spills to maintain their durability and shine.