Discover the step-by-step process to efficiently install a roll-up garage door to enhance your home’s convenience and security.
Installing a roll-up garage door can be a rewarding DIY project that enhances both the functionality and aesthetic of your garage. This process involves multiple steps, including measuring the garage opening, assembling the door, and finally, installing it.
This article will guide you through each of these steps in detail, ensuring you have a clear roadmap to follow. Whether you’re a seasoned DIY enthusiast or a beginner, you’ll find this guide comprehensive and easy to follow. So, let’s dive in and transform your garage with a brand new roll-up door.
- Detailed preparation is crucial for a successful installation.
- Having the correct tools on hand is essential for smooth installation.
- Choose the right materials for durability and aesthetic appeal.
- Thoroughly inspect all components before installation.
- Ensure proper positioning of the door and its components.
Preparation Required for Installing a Roll Up Garage Door

A successful roll-up garage door installation often starts with detailed preparation. This step involves evaluating the structural integrity of the location and ensuring the availability of a suitable power source.
Measure the garage door opening accurately, ensuring both the width and height are accounted for. Also, check the walls adjacent to the door and the roof space overhead for any obstructions like pipes, wires or beams.
To prevent potential pitfall, identify the location of the door opener in accordance to the manufacturer’s specifications. A smooth installation process requires clearing the pathway of installation and ensuring the workspace is free of debris or items that might obstruct movement.
Remember to gather all necessary tools beforehand to prevent interruption during the installation process. Finally, do not rush, take your time, prioritize safety above all.
Tools Needed for Installing a Roll Up Garage Door
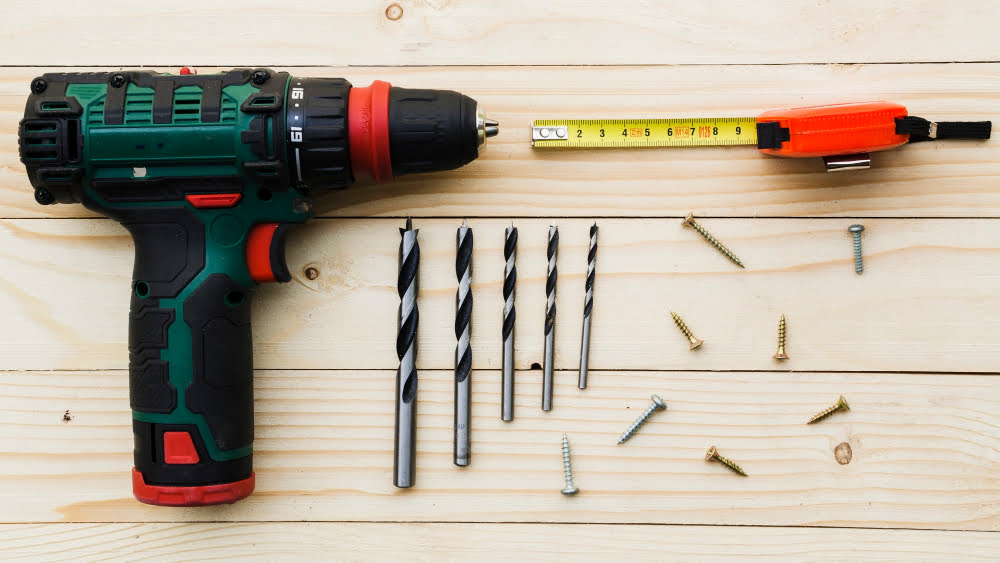
To ensure a smooth and successful installation, having the correct tools on hand is crucial. Firstly, a good drill or driver with appropriate drill bits will make securing components easier and more precise. Secondly, you’ll need a sturdy ladder to safely reach higher sections of the installation area. A tape measure can help in verifying dimensions and alignments, while a level ensures everything remains balanced and straight throughout the process.
A set of wrenches and sockets is indispensable for tightening bolts and fasteners; and make sure to have a pair of heavy-duty gloves to protect your hands. Finally, an angle grinder might be necessary to cut any excess parts or make adjustments. With these tools, you’ll be well equipped to manage your roll up garage door installation.
Choosing the Right Materials for a Roll Up Garage Door

Consideration of the correct materials is paramount in any roll up garage door installation. Primarily, these doors come in steel, aluminum, wood, and fiberglass.
Steel is durable and offers exceptional strength. Its resistance to denting and warping is unparalleled, making it perfect for high-traffic garages. However, it requires regular maintenance to prevent rusting.
Aluminum, on the other hand, is lightweight and resistant to rust, ensuring it remains visually impressive for longer. It might, however, be more prone to dents due to its lightweight nature.
Wooden doors offer unique aesthetics and natural insulation. However, they require frequent maintenance, including varnishing or painting, to lengthen their longevity and retain their appeal.
Fiberglass doors are resistant to denting and cracking. They are also less prone to rusting than steel. However, they may fade under extreme weather and are not very insulative, making them less suitable for extremely cold regions.
Ensure that you match your choice to your region’s climate, your garage’s usage, and your personal preference for ease of maintenance.
Unpacking and Inspecting the Roll Up Garage Door Prior to Installation
Once the roll up garage door arrives, it’s important to inspect each component thoroughly for potential damages that may have occurred during shipment. This step isn’t only to ensure that all parts are intact, but it also serves as an initial familiarization process with the different components that make up the door assembly.
Start by cutting the straps that secure the door, but exercise caution when doing so as the tightly wound door may spring open when the straps are cut. Lay out all the pieces on a clean, flat surface and cross-verify the contents of the packaging with the inventory list provided by the manufacturer. This step guarantees the availability of all necessary parts for installation.
It’s equally important to look for signs of physical damage on each part. Bent or broken components can lead to operational problems or even a full-scale failure later on.
Once the inspection is done, and you have ensured that all components are sound and accounted for, you can proceed with the preparation of the garage door wall opening. If there are missing or damaged parts, contact your supplier immediately to discuss returning the door or getting replacements.
How to Check and Prepare the Garage Door Wall Opening

To ensure a smooth installation process, you should first confirm if the garage door wall opening corresponds with the size of your roll up garage door. Here’s how to go about it:
1. Measure the height and width of the opening using a measuring tape. Accuracy is paramount, take note of even fractions of inches.
2. The opening should be level to guarantee that the door operates appropriately. Confirm this by placing a level on the bottom of the opening.
3. Examine the surrounding walls and ceiling. They should be sturdy enough to hold the door and all its components. Make any necessary repairs.
4. Keep an eye out for any obstructions, such as lights or shelves, inside and outside the opening. You should have enough room for the door to roll up and down freely, as well as for the necessary mechanisms involved.
5. If there is electricity running through this section, consider hiring a professional to safely reroute the wiring.
Absolutely follow these steps before moving on with the installation. They’ll contribute significantly to the proper functionality and longevity of your roll up garage door.
Positioning the Roll Up Garage Door and Parts Correctly
Start by laying out all components and hardware on a clean, level surface. Verify that all parts listed in the installation manual are present.
Next, place the door within the garage opening to check alignment. It’s crucial to position the roll-up door correctly for smooth operation. The door section must be centered within the opening, and the bottom bar should rest on the garage floor evenly. Fasten the mounting brackets onto the door, ensuring they are secured straight.
Identify the direction of roll-up for the door – this is typically towards the interior of the garage. Assemble the door with the curtain slats rolling up from the bottom. Don’t forget to align the edges properly – it aids in bearing the weight distribution evenly.
Finally, the door springs, torsion tube, and end bearings. Install the springs onto the torsion tube, ensuring the cable drum is properly set. Fit the tube across the width of the door. The end bearing plates must be located on the end of both sides of the door, ensuring the door rotates smoothly and stays horizontal when lifted. Remember, proper positioning of the door and its components will provide years of seamless operation, so take your time and double-check your work.
Guidance On Bracket Installation for a Roll Up Garage Door
Firstly, align your brackets with the pre-drilled holes allocated on the door frame. Ensure they’re positioned correctly – the wider edge will usually face the door. After aligning, fasten each bracket using the appropriate bolts and nuts provided with the door kit. Make sure these are tightened securely without stripping the threads.
Secondly, attach the axle supports to the brackets. These supports hold the door’s axle that allows it to roll up and down smoothly. Remember, they should be secured in a position where they don’t interfere with door operation.
Lastlly, install the track brackets on each side of the door. Attaching these to the vertical track sections enables the door to stay on course while operating. Double-check that these components are secured firmly to ensure safe door operation.
Throughout the entire installation process, always use the correct tools to ensure a firm and stable setup. Furthermore, practice caution as some parts may be weighty and pose risks if mishandled.
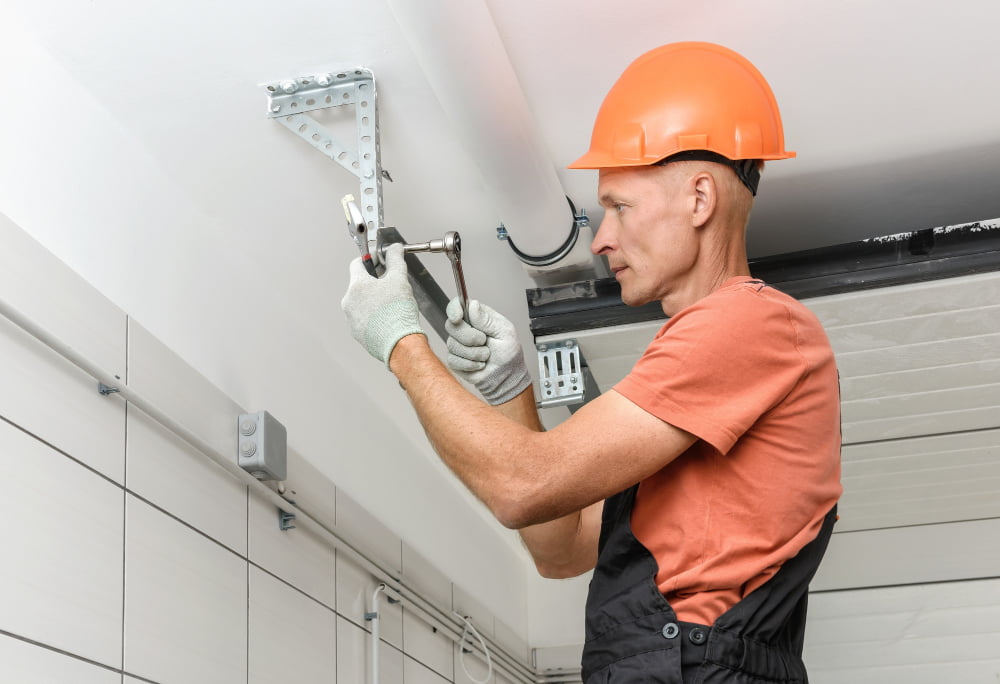
How to Safely Lift and Install a Roll Up Garage Door Assembly

Always start with safety precautions. Wear protective gloves to prevent any potential injuries and use the appropriate lifting gear if necessary. Handling a roll-up door assembly can be a hefty task, so enlist the help of at least one strong assistant.
To begin the installation, place your door assembly in the desired position. Ensure it’s centered with the wall opening and there’s adequate clearance for the door to roll up and down freely. Attach the assembly to trolleys via mounting brackets. The exact method might vary, so consult the manufacturer’s instructions to be precise.
Crucial is to secure the spring tension. While one person lifts the door, the other must fix the tension rod into place. Proceed with adjusting the cable drum and winding the cable onto it as per the manual’s guide. When the door reaches the full open position, utilize locking pliers on the tension rod to immobilize the drum.
Lastly, secure all components by tightening the set screws. Make sure to maintain equal tension on each side. Remember, uneven tension threatens the balance of your garage door and may lead to unnecessary wear and tear. So always double-check your work.
This operation requires extreme care. It’s not a race. Rather, be patient and meticulous to accomplish a job well done.
FAQ
Are roll up garage doors easy to install?
Roll-up garage doors with extension springs or the simple set torsion spring system can be easily installed by anyone possessing above-average mechanical skills, while standard torsion spring doors should be installed by a professional.
Can I install garage door myself?
While it’s possible to install a garage door yourself, it’s discouraged if you lack the right tools, face unique garage layout circumstances, or encounter unfamiliar electrical wiring, which can complicate and potentially endanger the installation process.
How long does it take to install a roll up garage door?
The installation time for a roll-up garage door largely depends on the size and model, but on average, it tends to range from 4 to 6 hours.
How much clearance is needed for a roll up garage door?
A six-foot roll up garage door requires at least 16 inches of clearance, while a 20-foot door needs a minimum of 25 inches of headroom.
What tools and materials are required to install a roll up garage door?
To install a roll up garage door, one would need tools like a drill, level, and wrench, as well as materials such as the roll up door itself, tracks, brackets, hinges, fasteners, weather seal, and torsion springs, among others.
Are there specific safety guidelines to follow during the installation of a roll up garage door?
Yes, during roll up garage door installation, it is crucial to follow specific safety guidelines such as ensuring adequate clearance, using proper lifting techniques and tools, adhering to electrical safety standards, and inspecting all parts for damage before installation.
What are the common mistakes to avoid while installing a roll up garage door?
Common mistakes to avoid while installing a roll-up garage door include incorrect measurements, improper track alignment, inadequate attention to safety instructions, and failure to test the door operation post-installation.